AWS Lambda and Rust
One of my long-term goals, for which I didn’t have the time recently, was to learn the Rust programming language. I have been learning it with some interruptions due to work commitments. Now it’s time to continue. The best way to learn is to build something. I have been thinking about what should be good training? The ultimate goal is to use Rust to write WebAssemblies. Besides that, what else can I do?
In recent years my work has been focused on DevOps and serverless architecture. Most of that work is on AWS, so combining Rust and serverless is the logical continuation. So why don’t we try Rust in the Lambda functions?
Did you know that Lambda runs on an open-source virtualization technology called “Firecracker”? AWS developed Firecracker using Rust language. That’s one more reason to learn the Rust language and try to understand the platform better.
The first thing to note is that Rust is not among officially supported Lambda runtimes. That’s not a problem because we are going to use a custom runtime. Lambda allows you to deploy your custom runtime with the function or, even better, to deploy it in a Lambda layer so multiple functions can re-use it.
Luckily we don’t need to build Rust custom runtime on our own because there is an existing project by AWS Labs that we can use. Moreover, there is a Serverless framework plugin with pre-built templates that utilize this runtime. What a time to be alive!
Start new Serverless framework project with Rust template:
npx serverless install \
  --url https://github.com/softprops/serverless-aws-rust \
  --name aws-lambda-rust
I only changed from the original template line number 64 in the GitHub action workflow configuration file main.yml. I have changed the region to eu-west-1, which better fits my needs. In the package.json, I have upgraded the framework to version 2 and added a serverless deployment bucket to avoid unnecessarily piling up S3 buckets and potentially hitting S3 limits. Check it out here.
npm i --save-dev serverless-deployment-bucketserverless.yml:
service: aws-lambda-rust
frameworkVersion: '2'
variablesResolutionMode: 20210326

provider:
  name: aws
  runtime: rust
  memorySize: 128
  stage: dev
  region: eu-west-1
  lambdaHashingVersion: 20201221

  deploymentBucket:
    name: serverless-deployment-bucket-${self:custom.accountId}
    serverSideEncryption: AES256

custom:
  accountId: ${aws:accountId}

plugins:
  - serverless-rust
  - serverless-deployment-bucket
Initialize local git repository:
git init
git add .
git commit -m "setup project"
For the next several steps, I am going to use GitHub CLI. In case that you don’t have it installed, you can follow the instructions here.
Login to GitHub:
➜  aws-lambda-rust git:(master) ✗ gh auth login
? What account do you want to log into? GitHub.com
? What is your preferred protocol for Git operations? HTTPS
? Authenticate Git with your GitHub credentials? Yes
? How would you like to authenticate GitHub CLI? Login with a web browser

! First copy your one-time code: XXXX-XXXX
- Press Enter to open github.com in your browser...
✓ Authentication complete. Press Enter to continue...
Create GitHub repository from command line:
gh repo create aws-lambda-rust --public
? Would you like to add a .gitignore? No
? Would you like to add a license? No
? This will add an "origin" git remote to your local repository. Continue? Yes
✓ Created repository zasarafljivac/aws-lambda-rust on GitHub
✓ Added remote https://github.com/zasarafljivac/aws-lambda-rust.git
Another great thing about the template that we are using is that it has GitHub actions already set. To make it functional, we need to add AWS keys into the GitHub secrets.
We have plenty of options to set our AWS secrets. In this example, I will use a GitHub CLI combined with AWS CLI. You can use GitHub UI or pass your secrets from CLI, but we will load it directly from the credential file profile. You can find other available options here.
Set AWS_ACCESS_KEY_ID:
gh secret set AWS_ACCESS_KEY_ID -b $(aws --profile YOUR_CREDENTIALS_PROFILE configure get aws_access_key_id) Set AWS_SECRET_ACCESS_KEY:
gh secret set AWS_SECRET_ACCESS_KEY -b $(aws --profile YOUR_CREDENTIALS_PROFILE configure get aws_secret_access_key)At this point, we push our code to the GitHub repository, and the deploy workflow starts.
git push -u origin master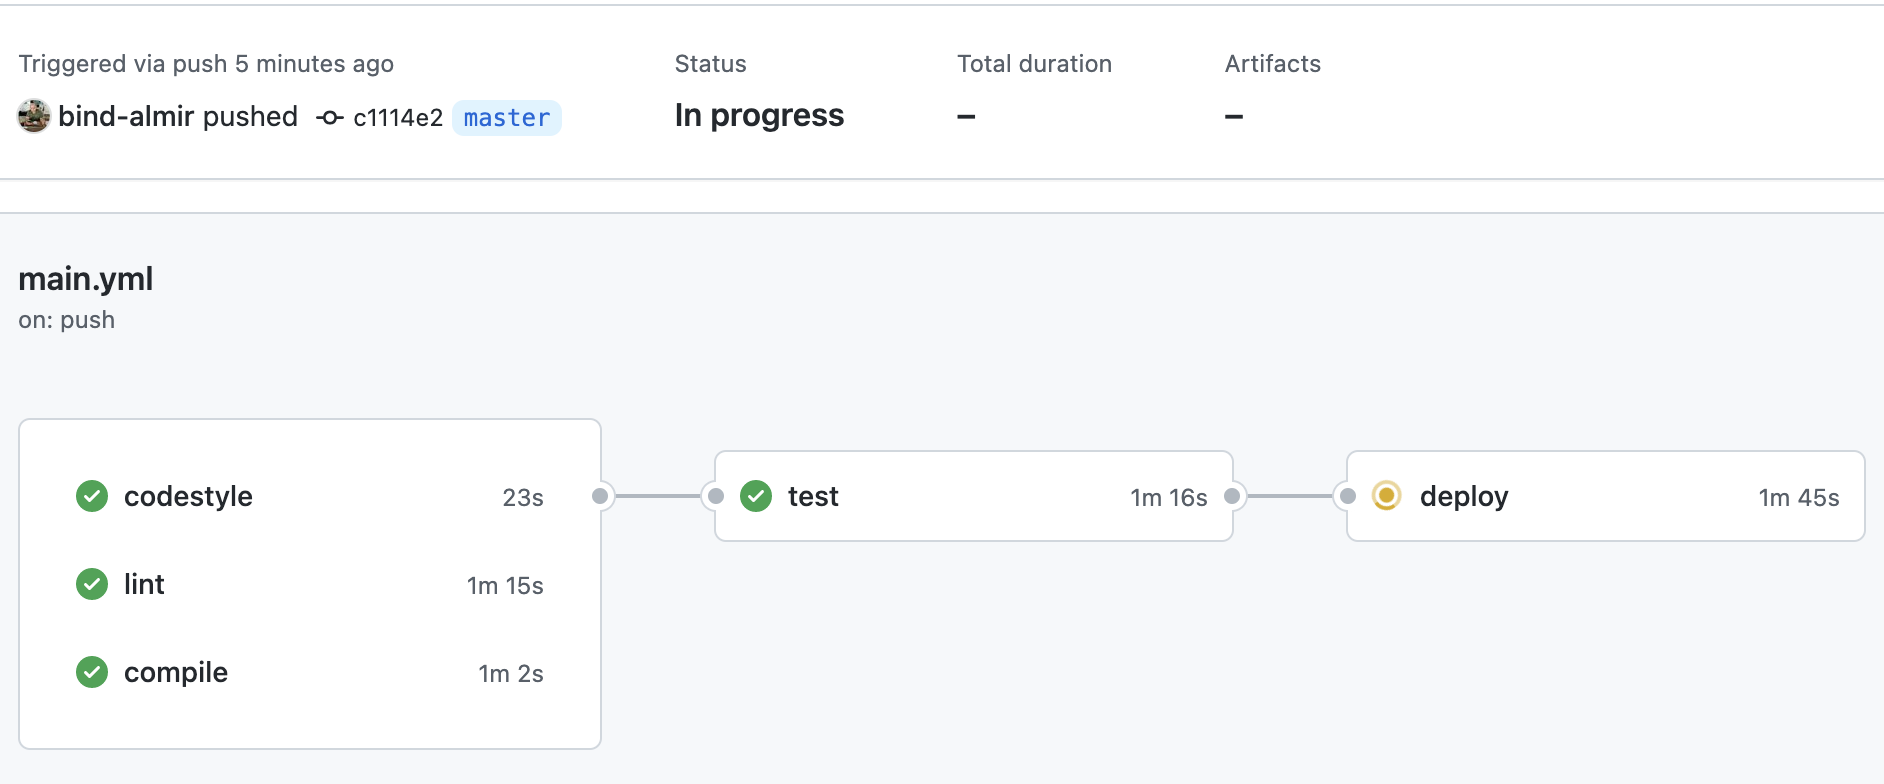
A few minutes later, if all goes well, we have our hello function deployed to the custom runtime (Rust in our case).

Great success! Now, everything that we have done so far was setting up a project. We have configured an almost production-ready workflow with just a few steps with the tooling and open-source projects that are available. We can test our default function to ensure that it is working, then let’s try to use Rust. The first thing that comes to my mind is to involve DynamoDB and create a CRUD API.
Earlier this year, AWS announced the Alpha version of the AWS SDK for Rust. Normally I would never advise using an unstable version of any framework or library, but since this is a learning project, let’s try and see how the future might look alike.
Update tokio to version 1, then add aws-config and aws-sdk-dynamodb crates to the dependencies so that Cargo.toml looks something like this:
[package]
name = "hello"
version = "0.1.0"
edition = "2018"

[dependencies]
tokio = { version = "1", features = ["full"] }
lambda = { git = "https://github.com/awslabs/aws-lambda-rust-runtime/", branch = "master"}
serde_json = "1.0"
aws-config = { git = "https://github.com/awslabs/aws-sdk-rust", tag = "v0.0.19-alpha", package = "aws-config" }
aws-sdk-dynamodb = { git = "https://github.com/awslabs/aws-sdk-rust", tag = "v0.0.19-alpha", package = "aws-sdk-dynamodb" }
The deployment job was failing due to some package incompatibilities with the older version of the lambda-rust container. To avoid that, I forked the serverless-lambda repository then updated the base image. See the related issue with more details here. I have updated package.json to point to the forked GitHub repository. I did this quick hack because this is a test project, and there is already PR that resolves containerized build. After the PR is merged, you can safely use the original npm package and remove this hack.
Because we want to create multiple functions in a single service, It’s time to make a workspace with the package for each Lambda. We will do it by updating the config.toml file and adding cargo packages for each of our functions. A workspace is a set of packages that share the same Cargo.lock and output directory.
[workspace]
members = ["./api/create", "./api/read", "./api/update", "./api/delete"]
Next, we’ll create the binary crates by running cargo new:
cargo new api/create
cargo new api/read
cargo new api/update
cargo new api/delete
Endpoint definitions:
functions:

  create:
    handler: create
    events:
      - http:
          path: /dynamo
          method: post
          cors: true

  read:
    handler: read
    events:
      - http:
          path: /dynamo
          method: get/{id}
          cors: true

  update:
    handler: update
    events:
      - http:
          path: /dynamo
          method: put
          cors: true

  delete:
    handler: delete
    events:
      - http:
          path: /dynamo/{id}
          method: delete
          cors: true
Since our functions will query DynamoDB, we need to add a policy to our execution role.
  iam:
    role:
      managedPolicies:
        - arn:aws:iam::aws:policy/AmazonDynamoDBFullAccess
By the way, before deploying, make sure that your code builds and that rustfmt is happy. Rustfmt is a tool for formatting Rust code according to style guidelines.
cargo fmt --all -- --checkAnd the linter of course:
cargo clippy --all-targets -- -D clippy::allI have created a table called “learn-rust” which I am going to use with these endpoints. Table attributes are not that important. I only want to enable CRUD operations.
Create item function is straightforward - nothing fancy here. Rust SDK does all the heavy lifting.
async fn add_item(
    client: &Client,
    item: Item,
) -> Result<(), SdkError<aws_sdk_dynamodb::error::PutItemError>> {
    let pk = AttributeValue::S(item.pk);
    let sk = AttributeValue::S(item.sk);

    match client
        .put_item()
        .item("PK", pk)
        .item("SK", sk)
        .table_name(item.table)
        .send()
        .await
    {
        Ok(_) => Ok(()),
        Err(e) => Err(e),
    }
}
Let make a post request…
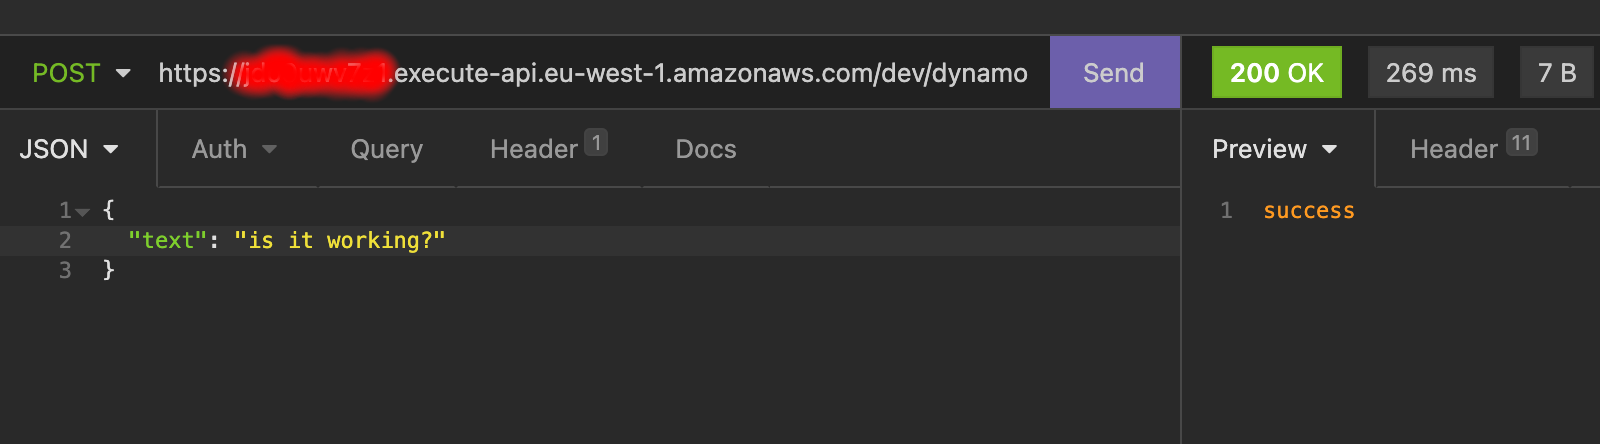
… then check the DynamoDB table:
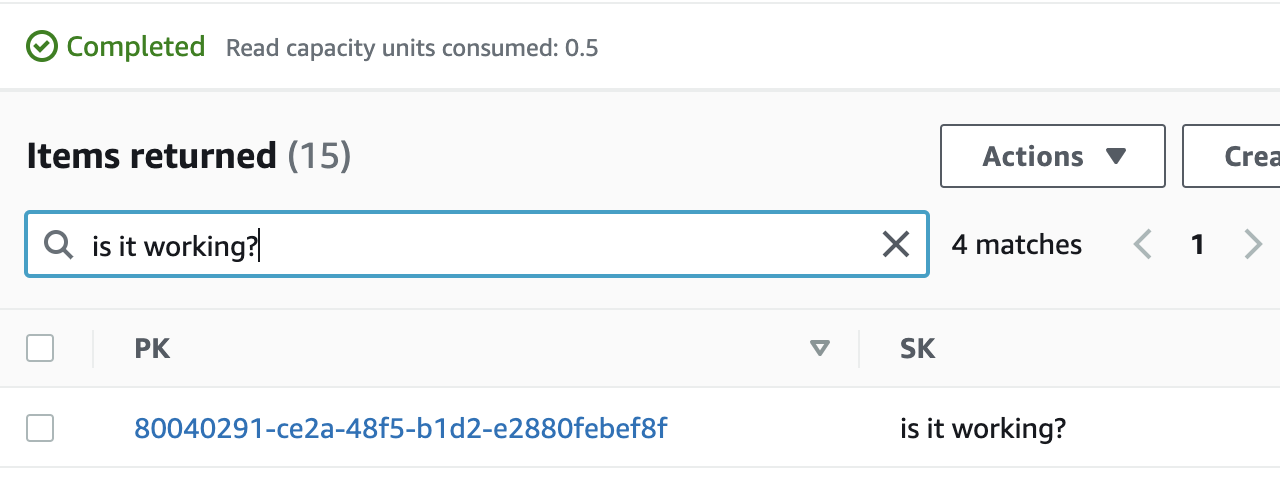
Now it’s time for a little break. In my book, this is progress. Probably not the high-quality code because I am in the process of learning. I will try to improve it at some point. So far I am happy with the outcome.
Learning something requires time and patience. I have started by reading “the Book” a few times to get familiar with the language concepts and syntax. The theory is one thing but building something is an entirely different story. Making this “simple” service was of great use to me. I ran into some issues with the compiling, packaging, testing, CI/CD…lots of things that always happen in real life when you least expect it. I am still getting used to the syntax, rules, and conventions. There is still much to learn.
If you are interested, the complete source code is available on GitHub.