Create CI/CD pipeline with AWS CDK
This article will explain how to host angular application on S3 and CloudFront over https and then how to create CI/CD pipeline for it.
There are few prerequisities that we need to take care of before we start. First you will need domain name on Route53 (application can be hosted on root domain or subdomain).
Create angular application and name it `angular-app`...
npm i -g @angular/cling new angular-app…then upload it to the new GitHub repository.
Next thing to do is to generate personal access token to connect Github with AWS CodePipeline. Add token as plain text to secrets manager with the name `cdk-pipeline-example`. This is important step because this token will authorize CodePipeline to access our source code repository. Any change on master branch will trigger our pipeline.
Assuming that you have AWS CDK installed we will start writing code. If you need help with setting up environment there are few helpful links in my previous article.
Create project directory then start a new cdk typescript project by executing following commands:
mkdir cdk-ci-cd-pipeline && cd cdk-ci-cd-pipelinecdk init --language typescriptOpen source code in your favorite IDE or editor. We will need to edit `lib/cdk-ci-cd-pipeline-stack.ts` file. So first thing to do is to get hosted zone from our existing domain. We will get domain name from command line input parameter on deployment.
const hostedZone = HostedZone.fromLookup(this, this.node.tryGetContext('domain'), {
  domainName: props.domainName,
  privateZone: false,
});
At this point we have reference to our domain hosted zone so we can request certificate from AWS ACM service. It doesn't matter in which region we are going to deploy stack but it is important that certificate is placed inside us-east-1 region. If you don't know why check the following link.
const frontendCertificate = new DnsValidatedCertificate(this, 'WebAppCertificate', {
  domainName: props.domainName,
  hostedZone,
  region: 'us-east-1'
});  // certificate region MUST be us-east-1
We will need S3 bucket to upload our static site. Let's create one with the same name as our domain.
const siteBucket = new Bucket(this, 'SiteBucket', {
  bucketName: props.domainName,
  websiteIndexDocument: 'index.html',
  websiteErrorDocument: 'error.html',
  publicReadAccess: true,
  removalPolicy: RemovalPolicy.DESTROY,
  blockPublicAccess: {
    restrictPublicBuckets: false,
    blockPublicAcls: false,
    ignorePublicAcls: false,
    blockPublicPolicy: false
  }
});
Now that we have our certificate and bucket we can proceed and create CloudFront distribution.
const distribution = new CloudFrontWebDistribution(this, 'WebAppDistribution', {
  aliasConfiguration: {
    acmCertRef: frontendCertificate.certificateArn,
    names: [props.domainName],
    sslMethod: SSLMethod.SNI,
    securityPolicy: SecurityPolicyProtocol.TLS_V1_1_2016,
  },
  originConfigs: [
    {
      s3OriginSource: {
        s3BucketSource: siteBucket
      },
      behaviors: [{ isDefaultBehavior: true }],
    }
  ],
  errorConfigurations: [
    {
      errorCode: 404,
      errorCachingMinTtl: 300,
      responseCode: 200,
      responsePagePath: '/index.html'
    },
    {
      errorCode: 403,
      errorCachingMinTtl: 300,
      responseCode: 200,
      responsePagePath: '/index.html'
    }
  ]
});
Final step in setting up static web site with https is to connect our domain with the distribution. For this we will create ALIAS record in route53.
new ARecord(this, 'ARecord', {
  recordName: props.domainName,
  zone: hostedZone,
  target: AddressRecordTarget.fromAlias(new CloudFrontTarget(distribution)),
});
This was complete guide how to setup static web site hosting on AWS over https. Instructions given above can be used to setup hosting for any website. You don't need steps that are coming up next but our goal is more than that. We want to setup continuous deployment for our web application which leads us to creating CodePipeline.
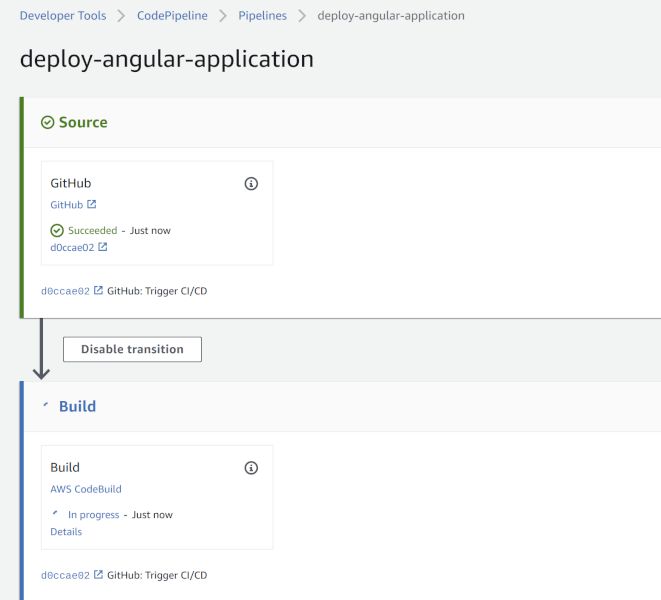
Our code pipeline will have two stages: source and build.
const pipeline = new Pipeline(this, 'FrontendPipeline', {
  pipelineName: 'deploy-angular-application',
});

// add Stages

const sourceStage = pipeline.addStage({
  stageName: 'Source'
});

const buildStage = pipeline.addStage({
  stageName: 'Build',
  placement: {
    justAfter: sourceStage
  }
});
Now that we have our stages defined we can create source action. For this we will need GitHub token mentioned at the begining of this article. Replace REPOSITORY_OWNER and REPOSITORY_NAME with your GitHub information.
const sourceOutput = new Artifact();
const sourceAction = new GitHubSourceAction({
  actionName: 'GitHub',
  owner: 'REPOSITORY_OWNER',
  repo: 'REPOSITORY_NAME',
  oauthToken: SecretValue.secretsManager('cdk-pipeline-example'),
  output: sourceOutput,
  branch: 'master',
  trigger: GitHubTrigger.POLL // default: 'WEBHOOK', 'NONE' is also possible for no Source trigger
});

sourceStage.addAction(sourceAction);
One more very important step is to allow CodeBuild to access S3 and CloudFront so it can update files and invalidate cache.
const role = new Role(this, 'CodeBuildRole', {
  assumedBy: new ServicePrincipal('codebuild.amazonaws.com'),
  managedPolicies: [
    ManagedPolicy.fromAwsManagedPolicyName('AmazonS3FullAccess'),
    ManagedPolicy.fromAwsManagedPolicyName('CloudFrontFullAccess')
  ]
});
And now we can create build project with buildspec.yml. This file contains instructions how to build, deploy app and invalidate cache after deployment.
const codeBuild = new Project(this, 'CodeBuildProject', {
  role,
  buildSpec: BuildSpec.fromObject({
    "version": 0.2,
    "phases": {
      "install": {
        "runtime-versions": {
          "nodejs": 10
        },
        "commands": [
          "echo installing dependencies",
          "npm install",
          "echo installing aws cli",
          "pip install awscli --upgrade --user",
          "echo check version",
          "aws --version",
          "echo installing angular cli",
          "npm i -g @angular/cli"
        ]
      },
      "build": {
        "commands": [
          "echo Build started on `date`",
          "echo Building angular-app",
          "ng build --prod"
        ],
        "artifacts": {
          "files": [
            "**/*"
          ],
          "base-directory": "dist/angular-app",
          "discard-paths": "yes"
        }
      },
      "post_build": {
        "commands": [
          "echo BUILD COMPLETE running sync with s3",
          `aws s3 rm s3://${props.domainName}/ --recursive`,
          `aws s3 cp ./dist/angular-app s3://${props.domainName}/ --recursive --grants read=uri=http://acs.amazonaws.com/groups/global/AllUsers`,
          `aws cloudfront create-invalidation --distribution-id ${distribution.distributionId} --paths "/*"`
        ]
      }
    }
  })
});
Finally add build action to build stage and we can proceed to deployment.
const buildAction = new CodeBuildAction({
  actionName: 'Build',
  input: sourceOutput,
  project: codeBuild
});

buildStage.addAction(buildAction);
We can build and deploy our stack by providing account number, region and domain.
npm run buildcdk deploy -c region=YOUR_REGION -c account=YOUR_ACCOUNT_NUMBER -c domain=example.comIf all goes well you should receive following message:
This deployment will make potentially sensitive changes according to your current security approval level (–require-approval broadening). Please confirm you intend to make the following modifications:
Review changes, confirm and then CDK will start deploying your stack. You can track changes in the terminal or you can open AWS CloudFormation console. It will take approximatley 20-30 minutes for your stack to be deployed. This is normal behaviour because it takes few minutes for your certificates to provision and approximatley 20 minutes for CloudFront to settle.
Deployment on my account took 25 minutes.
Do you wish to deploy these changes (y/n)? y
PipelineStack: deploying...
Updated: asset.**************** (zip)
PipelineStack: creating CloudFormation changeset...
  0/20 | 1:09:49 PM | CREATE_IN_PROGRESS
...
...
...
...
  20/20 | 1:34:32 PM | CREATE_COMPLETE      | AWS::CloudFormation::Stack          | PipelineStack

✅  PipelineStack
If everything went well we have our static angular web site hosted on S3 with CloudFront cdn over https and Continuous Deployment with CodePipeline. Whenever we change something on master branch CodePipeline will build, deploy and invalidate cache. After few minutes Our changes will be available online.
If you want to remove infrastructure that we have just created use AWS CloudFormation console or CDK command line:
cdk destroy -c region=YOUR_REGION -c account=YOUR_ACCOUNT_NUMBER -c domain=example.comFull source code can be found on GitHub. If you have any questions feel free to use GitHub issues.